Alarm zone
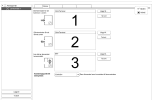
- Click the Zones tab.
- Click New.
- Enter a name for the Zone and select Alarm zone.
- Click the Doors tab and add the doors used for the zone area.
Control 1 (in) 2 (out) 3 (inner) Alarm on with A YesNo Yes, reader A Cancel alarm activation Yes Yes Yes Alarm off with tag Yes No No Spoken message on warning No Yes Yes, reader A Spoken message on warning on alarm activation Yes Yes Yes, reader A Red LED (optional) Yes No Yes, reader A and B Alarm on/off via menu (A66) Yes Yes Yes - Enter the door controller that is connected to the alarm system.
- Click the Alarm (general) tab.
- Select Card or Card + PIN to set or unset the alarm. Set a schedule for setting the alarm, where applicable.
- Set warning time for alarm set methods. Pre warning, if the alarm is automatically set according to schedule, it starts when the schedule starts.
- In the Alarm (connection) tab, configure the connection.
- Select whether the alarm control should be bistable or monostable.
- If the bistable feature is enabled, the alarm relay will follow the connection status.*
- If the monostable feature is enabled, the alarm relay will pulse when setting and unsetting.*
- If the alarm control is monostable, select the pulse length.
- Configure relevant settings.
- Select ASF Enabled (Alarm Status Feedback) if a feedback signal from the alarm system is being used.
- Set the maximum time the ASF signal can delay when setting the alarm ASF Timeout.
- Set how VAKA should react if ASF is not engaged.
- The setting Voltage on ASF input indicates alarm setting determines whether setting and unsetting via ASF is performed with voltage or potential-free signal.
- Select whether the alarm control should be bistable or monostable.
- In the Alarm (advanced) tab, configure alarm indication and pre-alarm relay..
- Click Save to close.

*Depending on the alarm system, disconnection may be delayed. Red indicator on reader illuminated/flashing during delay.